English 

T: +86-180-0799-3137
E: info@refinecolor.com
E: info@refinecolor.com
9F, Building 25, Tian 'an Shenchuanggu, Fenggang Town, Dongguan 523703, China

Views: 0 Author: Site Editor Publish Time: 2025-10-06 Origin: Site
If you want vibrant, durable, and professional-grade customizations on hard goods no longer requires a significant investment in specialized printing equipment. With pre-printed UV DTF (Direct-to-Film) Type B transfers, small businesses, hobbyists, and prototype developers can achieve stunning results with minimal tools and setup. Whether you're customizing drinkware, personalizing tech accessories, or branding corporate gifts, this article is the best resource for mastering UV DTF application without a printer.
Before diving into the application process, it's essential to understand the technology you're working with. This knowledge will not only improve your results but also help you troubleshoot any issues that may arise.
A UV DTF Type B transfer is a ready-to-apply decal or sticker created through a specialized printing process. It consists of multiple layers: a base adhesive, a layer of white ink, a layer of colored CMYK ink, and a protective top coat of varnish. All these layers are printed onto a carrier film (Film A) and then sealed with a top application film (Film B). The end user receives this complete "sticker sandwich," ready to be applied to a final product without needing any ink, glue, or curing lamps.
UV DTF printing is the industrial process used to create these transfers. It employs a specialized flatbed or roll-to-roll printer like theRefinecolor RF-ZZ2F equipped with UV-curable inks and powerful UV LED lamps. As the ink is jetted onto the film, the lamps instantly cure (harden) it, layer by layer. This process allows for the creation of textured, glossy, and incredibly durable graphics that can be transferred to a wide variety of non-porous surfaces.
The acronym stands for Ultraviolet Direct-to-Film.
· UV: Refers to the Ultraviolet light used to instantly cure the ink, making it solid and durable.
· DTF: Stands for Direct-to-Film, indicating the process of printing the design onto a transfer film rather than directly onto the final object.
In the production world, the process often involves an "A/B film" system. Film A is the printable carrier sheet, and Film B is the clear top lamination sheet that is applied after printing. Together, they create the final transfer.
For the end-user applying a pre-made design, the terms are simplified. You are working with the finished product, which is often colloquially referred to as a Type B Film or simply a "UV DTF transfer sticker." You don't need to handle separate A and B films; you receive the complete, ready-to-apply transfer.
This is a common point of confusion. The key difference lies in the intended substrate and application method:
· UV DTF: Designed for hard, rigid, non-porous surfaces (glass, metal, plastic, ceramic). It uses a pressure-sensitive adhesive and is a cold-peel application. No heat is required.
· DTF (Direct-to-Film): Designed for textiles and fabrics (cotton, polyester, blends). It uses a hot-melt adhesive powder and requires a heat press to transfer the design to the garment.
Opting for pre-printed UV DTF transfers is a strategic choice for many users. The primary advantage is bypassing the significant capital investment in a UV DTF printer, which can cost thousands of dollars, plus ongoing expenses for ink, film, and maintenance. This approach democratizes high-quality product customization, making it accessible for:
· Small Businesses: Fulfill small-batch custom orders without holding inventory.
· Prototyping: Test new designs and product concepts cost-effectively.
· DIY Enthusiasts: Create one-of-a-kind personalized items with a professional look.
· Event Planners: Produce branded merchandise for specific events.
Let's debunk some common misconceptions about using pre-printed UV DTF transfers.
· Myth: Type B always requires manual UV glue and curing.
· Fact: This is incorrect for the "without a printer" method. Users purchase pre-printed Type B transfer films where the ink is already cured and the adhesive is integrated. The process is simply: cut the design, apply it to the surface with pressure, and peel away the carrier film. No printer, external glue, or UV curing lamp is needed on your end.
· Myth: Type B sticks perfectly to any surface.
· Fact: Adhesion is highly dependent on surface energy and texture. Low-surface-energy (LSE) materials like polypropylene (PP), polyethylene (PE), and silicone are notoriously difficult for adhesives to bond with. Similarly, rough, porous, or powder-coated surfaces present challenges. For a successful application, the surface must be smooth, clean, and have sufficient surface energy. Pre-treatment or choosing a different substrate is sometimes necessary.
Before you begin customizing products, especially those for sale or personal use, adhere to these critical safety guidelines:
· Not Food-Contact Safe: UV inks are not rated for direct food contact. When applying to drinkware, ensure the design is kept 2–3 mm away from the rim or any area that will come into contact with the user's mouth.
· Care Instructions: The transfers are durable but not indestructible. They are not dishwasher or microwave safe. The high heat and harsh detergents will cause the adhesive to fail. Advise customers to hand-wash with cool water only.
· Child Safety: Avoid applying transfers to children’s items, like toys or pacifiers, that could be peeled off and put in the mouth. The small parts could pose a choking hazard.
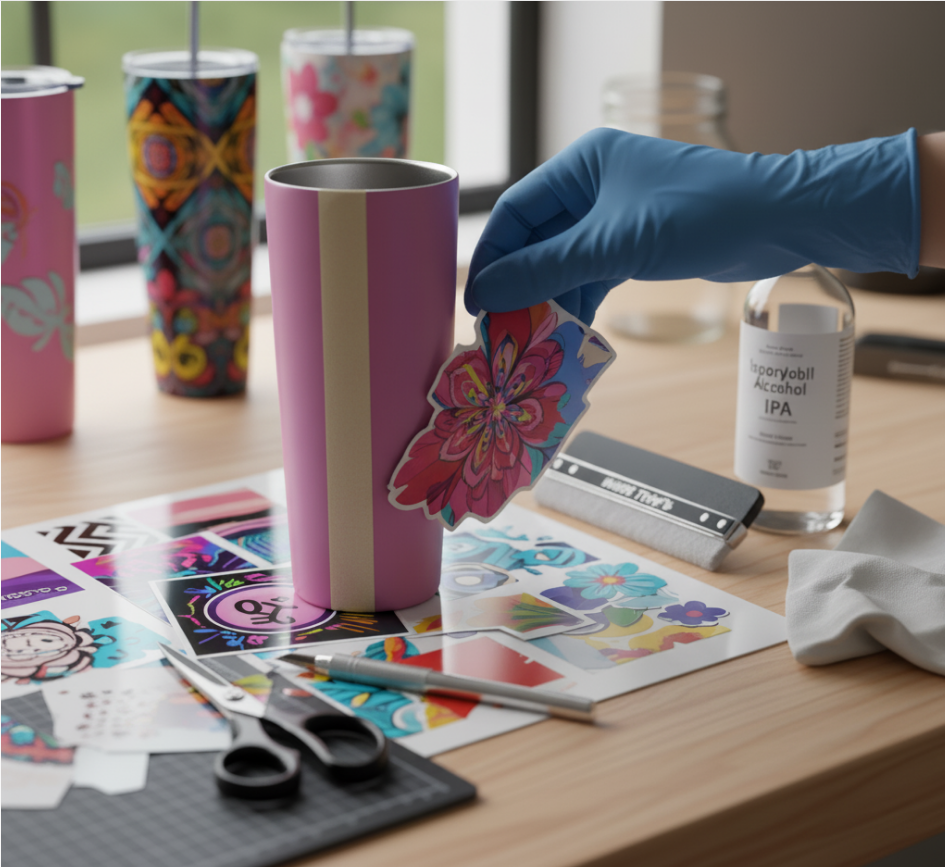
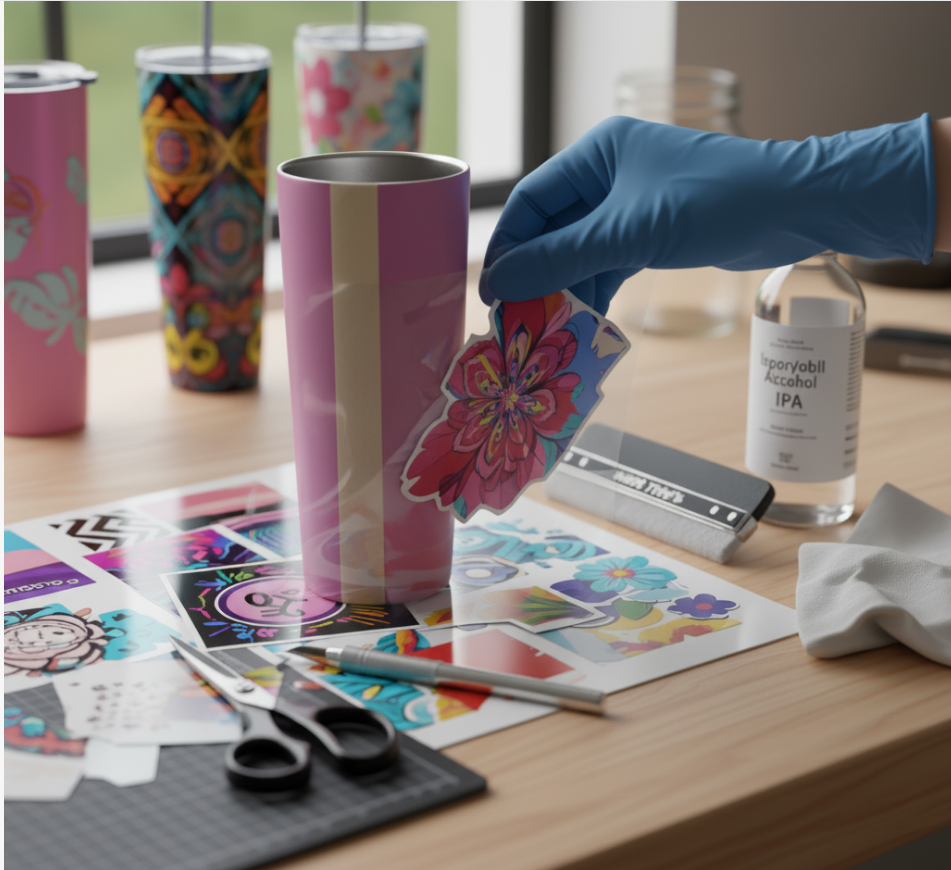
One of the most appealing aspects of this method is the minimal equipment required. You can achieve factory-quality results without a UV printer, curing lamp, or heat press. All you need are your pre-printed films and a few basic application tools. This accessibility makes Type B transfers a perfect solution for DIY projects and lean business operations.

· Pre-printed UV DTF Type B Films: The core of your project. These can be sourced from online marketplaces or custom-printed by a service provider.
· Squeegee or Hard Card: A felt-edged squeegee is ideal to apply firm, even pressure without scratching the film. A credit card can work in a pinch.
· Scissors or Craft Knife: For neatly cutting your design out from the larger sheet.
· Lint-Free Cloth: Essential for cleaning the substrate without leaving behind fibers.
· Isopropyl Alcohol (IPA): The best solution (70% or higher) for cleaning surfaces to remove oils, dust, and residues, ensuring maximum adhesion.
· Masking Tape or Painter's Tape: Crucial for the "hinge method" to ensure perfect alignment before application.
· Ruler or Measuring Tape: For precise placement and centering of your design.
· Plastic Scraper: Useful for removing failed applications or stubborn residue without damaging the surface.
· Gloves: Nitrile gloves can help prevent fingerprints and oils from your hands from contaminating the surface or the transfer's adhesive.
UV DTF transfers excel on smooth, non-porous surfaces. Your success rate will be highest with materials like:
· Glass and Mirrors
· Glazed Ceramics (Mugs, Tiles)
· Painted or Coated Metals (Tumblers, Tins)
· Hard Plastics like ABS and Polycarbonate (PC)
· Varnished or Lacquered Wood
Before applying any transfer, run through this quick mental checklist to prevent wasted material and time:
1. Clean: Is the surface completely free of dust, oil, and moisture?
2. Identify: Do you know the material? (Avoid LSE plastics like PP/PE if possible).
3. Assess: Is the surface smooth? Is the curvature manageable?
4. Adapt: If the surface is unsuitable (e.g., too curved or textured), can you switch to a different item or segment the transfer film into smaller pieces to apply individually?
This section provides a detailed, sequential workflow for a perfect application every time. Follow these steps meticulously to avoid common pitfalls like bubbles, lifting, and misalignment.
You can either purchase stock designs from online sellers or submit your own artwork to a custom UV DTF printing service. When ordering custom prints, ensure your design file is high-resolution (300 DPI recommended) and has a transparent background. Once your film arrives, inspect it for any printing defects before proceeding.
This is the most critical step for ensuring a strong, lasting bond. Any contaminant, however small, can compromise adhesion.
1. Put on gloves to avoid transferring skin oils to the surface.
2. Dampen a lint-free cloth with Isopropyl Alcohol (IPA).
3. Thoroughly wipe down the entire application area on your object.
4. Allow the surface to air dry completely. Do not touch it with your bare hands after cleaning.

Using scissors or a craft knife, carefully cut out your desired design from the main sheet. Leave a small, uniform border (1-2 mm) around the design if possible, as this can make it easier to handle and apply. Avoid touching the adhesive side of the transfer.
Accurate placement is key to a professional look. For precise alignment, use the Hinge Method:
1. With the backing paper still on, place the transfer onto your object.
2. Once you are satisfied with the position, apply a strip of masking tape along one edge, securing the transfer to the object. This tape acts as a "hinge."
3. Flip the transfer over on its hinge, exposing the paper backing.
4. Carefully peel away the paper backing, exposing the sticky adhesive. Be careful not to let the exposed adhesive touch anything prematurely.
This is where the magic happens.
1. Carefully flip the transfer back down onto the surface using the hinge for guidance.
2. Using your squeegee, start from the center of the hinged side and work your way outwards.
3. Apply firm, overlapping strokes in small, fan-shaped sections. This method pushes air out towards the edges, preventing bubbles from getting trapped. Do not try to apply the whole sticker at once.
4. Go over the entire design multiple times with the squeegee, ensuring every part of the transfer has made solid contact with the surface. Pay special attention to the edges.
Patience is crucial here.
1. Begin at one corner and start peeling the clear top carrier film back on itself.
2. Maintain a slow, low-angle peel. Pulling it back at a sharp angle (close to 180 degrees) is much more effective than pulling straight up (90 degrees).
3. Watch carefully to ensure the design is fully adhering to the object. If you notice any part of the design lifting with the carrier film, lay the film back down, press firmly on that area again with your squeegee or fingertip, and then resume peeling.
When applying to curved surfaces like a mug or tumbler, the film can wrinkle or buckle. To prevent this, incorporate these techniques:
· Micro Relief Cuts: Before application, make a few tiny (1-2 mm) relief cuts into the waste area of the carrier film around the design, pointing towards the center. This allows the film to flex around the curve more easily.
· Edge Setback: Position your design so it is at least 1–2 mm away from any hard edge or rim. This prevents the edge of the transfer from catching and peeling over time.
Once the carrier film is removed, the process isn't quite over.
1. Take the soft, papery backing sheet you removed earlier (or a piece of parchment paper) and place it over the exposed design.
2. Using your finger or a soft cloth, re-press firmly over the entire design, especially the edges. This is called post-burnishing and helps to maximize the adhesive bond.
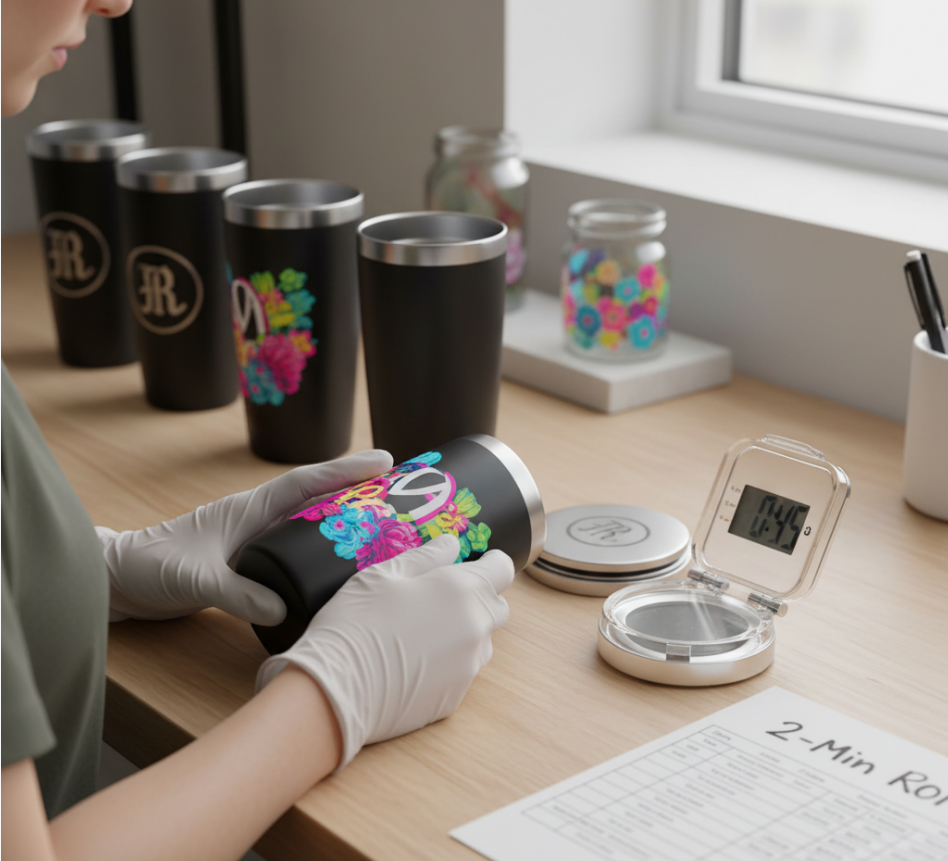
3. For best results, let the object rest for 12–24 hours. This allows the pressure-sensitive adhesive to fully cure and build its maximum bond strength before the item is handled or washed.
For over 99% of pre-printed UV DTF transfers, this step is unnecessary and not recommended. The vast majority are designed for a cold-apply, cold-peel process. Only use mild heat from a heat gun if this is explicitly required by your film supplier. Do not default to using a heat press or UV curing lamp, as this can damage the transfer or the object. Always follow the manufacturer's specific instructions.
· Working With Solid Color Designs: Bold text, logos, and silhouette-style graphics are perfect candidates as they are forgiving to apply and have strong visual impact.
· Making Prototypes For New Designs: Quickly and cheaply create physical samples of a new product to test the design, size, and placement before committing to a large production run.
· Small Batch Customization: Ideal for fulfilling orders of 1 to 50 pieces for events, corporate gifts, or Etsy shops.
· Producing in High Quantities: For orders of hundreds or thousands, the manual labor involved becomes inefficient and costly. Automated or direct-to-object printing is better suited for mass production.
· Highly Detailed Designs: While possible, intricate designs with very fine, freestanding elements can be difficult to apply manually without tearing or misalignment.
· Photographic Reproductions: Achieving perfect photographic quality requires a pristine, dust-free environment and flawless application, which can be challenging to achieve consistently with manual methods.
Use this quick-reference matrix to gauge the likely success of your application.
Adhesion Level | Surface Types |
✅ High | Glass, glazed ceramic, stainless steel, painted metal, hard plastics (ABS, PC), acrylic, varnished wood. |
⚠️ Medium | Lacquered wood, matte-finish surfaces, some smooth powder coats. (Test first and press very firmly). |
❌ Low | Low-Surface-Energy plastics (PP, PE), silicone, rubber, unfinished wood, fabric, rough powder coats, "orange-peel" textured surfaces. |
Go from amateur to expert with these advanced techniques that ensure a perfect, durable finish.
For consistently great results on mugs, bottles, and helmets, adopt this Standard Operating Procedure (SOP):
1. Position & Hinge: Align your transfer and apply a masking tape hinge along the longest, straightest edge.
2. Relief Cuts: Before peeling the backing, make 3–5 small radial relief cuts into the clear carrier film around the tightest curves of your design.
3. Sectional Application: After peeling the backing, apply the transfer section by section, starting from the hinged edge and squeegeeing in small segments to smoothly conform the film to the curve.
After application, perform this quick Quality Control check to validate your work.
· Visual Check:
· Are there any air bubbles larger than 1 mm?
· Is there any "silvering" (a hazy look caused by micro air pockets)?
· Does the design have ≥95% edge continuity with no lifting?
· Adhesion Test (After 24-hour rest):
· Tape Test: Press a piece of strong adhesive tape (like 3M 600) firmly over the design and pull it off at a 45° angle. The transfer should show no signs of lifting.
· Water Test: For items that will be washed, a 30-minute soak in cool water should result in less than 5% edge lift.
· Durability Reminders:
Confirm the product will not be put in a dishwasher or microwave.
Even with careful preparation, issues can arise. Here’s how to fix them.
Failure | Root Cause | Fix |
Lifting Edges | Oily surface / low surface energy / too tight curve | Clean with IPA; leave edge gap; switch substrate or use a primer |
Air Bubbles | Applied too wide in one pass | Use Hinge method; press out from the center |
Residue or Haze | Uneven pressure / low temp / rough surface | Re-press; apply light heat (if supplier recommended); switch to smoother base |
Hard to Remove on Glass | Aged adhesive / large area | Warm surface (gentle dryer); use a plastic scraper, clean up with alcohol |
If an application goes wrong or you need to remove an old design, use gentle heat from a hairdryer to soften the adhesive. Then, carefully use a plastic scraper or razor blade (at a low angle to avoid scratches) to lift the design. Any remaining adhesive residue can be easily cleaned off with Isopropyl Alcohol (IPA).
This is almost always due to improper surface preparation. The number one cause is an oily or contaminated surface. Re-clean the area with IPA and try again with a new transfer. If the issue persists, the material itself may be a low-surface-energy plastic, which is unsuitable for this application method.
If your design tears while you are peeling the carrier film, it's usually because you are peeling too fast or at too high an angle. Lay the film back down, press the torn area firmly, and resume peeling very slowly at a low, sharp angle.
While the "printer-less" UV DTF method can produce exceptional, professional-grade results, it's important to have realistic expectations. The final quality is a direct result of three factors:
1. The quality of the pre-printed film from your supplier.
2. The compatibility of your chosen substrate.
3. The precision and care of your manual application.
Minor imperfections may occur, but by following this suggestion, you can achieve a success rate that is more than sufficient for profitable small-business operations or high-quality personal projects.
This is the most significant benefit. You gain access to a cutting-edge customization technology with virtually zero upfront investment in hardware, eliminating costs related to printer purchase, ink, maintenance, and the steep learning curve.
There are no messy inks, powders, or chemicals to handle. The process is clean and dry. Once the transfer is applied and burnished, the product is essentially ready for use (after the recommended rest period), allowing for rapid turnaround times.
This method empowers creators to produce products that look like they were made in a factory. It bridges the gap between handmade and mass-produced, offering a professional look that can elevate your brand or craft projects.
Understanding your costs is crucial for business success. Here’s a simple way to calculate your return on investment (ROI).
To find your true cost for each customized item, use this formula:
Cost-per-Piece = (Film Price ÷ Pieces per Film) + Shipping Cost per Piece + (Your Labor Rate $/hr × Application Minutes / 60) + (Loss Rate % × Material Cost)
To estimate how many items you can produce, use this formula:
Pieces per Day ≈ (60 ÷ Minutes per Piece) × Available Work Hours
Example Calculation:
· You buy an A4-sized film for $4.00, and it contains 8 small logos.
· Your labor is valued at $20/hr, and it takes you 3 minutes to apply one logo.
· Cost per design from film: $4.00/8 = $0.50
· Labor cost per piece: ($20/60 minutes) * 3 minutes = $1.00
· Base Cost per Piece ≈ $1.50 (excluding shipping, loss rate, and the cost of the blank item).
Websites like Etsy, Alibaba, and Amazon are excellent sources for pre-printed, non-custom designs ("gang sheets"). This is a great way to get started and test different styles.
Some local sign shops or craft suppliers are beginning to offer UV DTF printing services. This can be a good option for quick turnaround times and supporting local businesses.
For custom logos and branded artwork, you'll need to use a dedicated print-on-demand service. A quick search for "custom UV DTF printing" will yield many online providers who can turn your digital designs into physical transfers.
You now possess the comprehensive knowledge to successfully apply UV DTF Type B transfers without a printer. This method is a powerful tool for creating durable, high-impact custom products with minimal investment. It's time to put this knowledge into action.
· For DIY Users: Start by ordering a small variety pack of pre-printed designs to practice on different surfaces. Focus on mastering the cleaning, hinge, and peeling techniques.
· For Small Businesses: Your first step is to vet a reliable custom print supplier. Order a small batch of 10 sample pieces of your own design. Apply them to your core product and rigorously evaluate them using the QC checklist. Once you are confident in the quality and your application process, use the ROI formulas to price your products for profitability and scale up your production.
A: Yes, for hard surfaces (UV DTF). You can purchase pre-printed UV DTF transfers and apply them manually. For textiles (traditional DTF), you would need to buy pre-printed transfers and still need a heat press for application.
A: To print them, you need a specialized UV DTF printer, UV-curable inks (CMYK + White + Varnish), A/B film rolls, and RIP software. This guide focuses on applying them without needing any of that equipment.
A: Yes, a dedicated UV printer is required to create the transfers. Standard inkjet or laser printers cannot be used.
A: UV DTF is best for smooth, hard, non-porous surfaces like glass, metal, glazed ceramics, hard plastics, and varnished wood. It is not suitable for fabrics or rough, porous, or flexible silicone surfaces.
A: No. UV DTF is a cold-application process. A heat press is not needed and should not be used unless explicitly instructed by your supplier for a specialty type of film.
A: It's not efficient. While you can fulfill small to medium-sized orders, the manual labor for applying transfers one by one makes it impractical for true large-scale production (thousands of units).
A: For pre-printed transfers, look on online marketplaces like Etsy or Alibaba. For custom prints, search for "custom UV DTF printing services." If you were to purchase a printer, you would source it from a factory or distributor like Refinecolor.
